
Frrom 1/72 Mystere IV
- Yoav Efrati
- Oct 19, 2025
- 8 min read
Azure’s Magical Mystere Tour
By Yoav Efrati
Producer: Azure FRROM
Subject: Mystere IV
Scale: 1:72
Stock Code: FR020 French, FR021 Israel
Media: IM, PE, RE
Recommended Minimum Skill Level: Intermediate
Authors Additional Investment: Moderate
Special Tools and Accessories:
Aeroclub: 1/72 scale ejection seats EJ024.
IsraDecal sheet IAF-32 Israeli Mystere IVs.
Hypodermic needles,
Evergreen plastic rods
Assorted flat brass rods
Paints Used:
Humbrol: 1, 2, 11, 20, 33, 40, 53, 113, 123, 126, 140, 154, 155, 174, 220,
Xtracolor: X508, X506, X105, X21
Tamiya: X19
Alclad II paints: ALC-105 Polished Aluminium, ALC-106 White Aluminium.
Weathering Agents:
Van Gogh Oil paints: Burnt Umber, Titanium White, PaynesGrey, Ivory Black, Oxide Yellow
Further Reading:
1. Mystere IV in IAF Service – Ra’anan Weiss, IsraDecal Publications 2009.
ISBN 978-965-7220-12-2
2. Swept-Wing Backbone Mystere IV in Israeli Service – March/April 2005 Issue 116 of Air Enthusiast –Article Written by Shlomo Aloni
3. IPMS/Israel Kne-Mida Magazine issue no.33
Introduction:
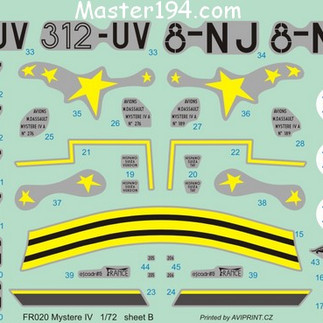
Azure's new release of the Mystere IV comes in three different versions. To build the Israeli versions shown, I used three Israeli markings kits and one French.


The Israeli version features striking box art showing Ami Gadish of the Valley squadron, downing an Egyptian MiG-17 Fresco C, on the first day of the June 1967 “Six Day War” over Kabairit air base. The Box art can be used as reference for detailing where the only error found being the identification bands on the Egyptian MiG-17 being red instead of black.
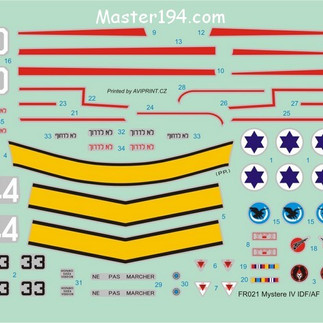
Markings for all four versions were taken from the kits, with the exception of Cartograph printed 101 squadron and Flying Wing squadron insignia and 09 numerals found in IsraDecal”s IAF-32 Mystere decal sheet.


Mystere IVs serial numbers 147 and above had a single piece horizontal stabilizers installed. Mystere 33 (s/n 164),Mystere 09 (s/n 214), Mystere 10 (s/n 216) and Mystere 44 (s/n 156) require the use of parts 11 and 12 shown crossed out in the kit instructions. The MB Yam-4 resin ejection seat provided in the kit is appropriate for late service French Mystere’s but looks nothing like the SNCASO seats installed in IAF Mysteres that I had obtained from Aeroclub (EJ024).
External Stores
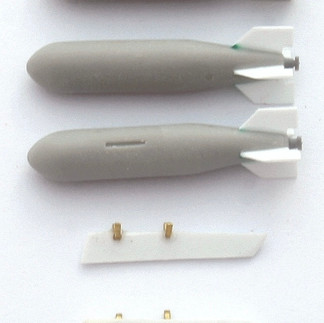
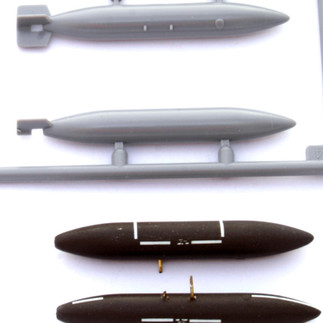
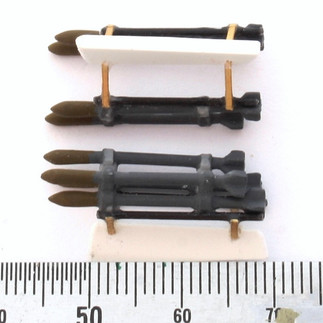
No external stores or pylons are provided in the kits, so I scratch built the pylons from Evergreen styrene sheets, and converted the fuel tanks and weapons from existing weapons sets.


A pair of 625 litre fuel tanks fitted to Mystere 10 were left over from HPM Nesher kits. These tanks had to be lengthened by 7mm to bring them to the correct 1/72 scale length of 58mm. Six other fuel tanks were made from Vulcan canon pods (part option 1 and 2) found in Hasegawa's weapon set II.

K & S tubing cutter, was used to remove a section of each pod in order to bring each one to a length of 58mm. K&S tubing cutter was also used to scribe circumferential panel lines around each fuel tank.


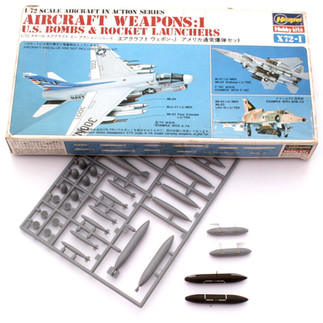
Hasegawa weapons set X72-1 was my source for rocket pods attached to Mystere 33, Napalm canisters attached to Mystere 44 and the 11 mm long 625 litre fuel tanks made from shortened Vulcan canon pods. The T-10 rockets attached to Mystere no.09 were leftovers from Valom’s Ouragan and the bombs attached to Mystere no.10 were poor facsimiles taken from a Hasegawa F-16.


Aeroplane Assembly
When assembling the cockpit, do not attach the side walls to the floor; assemble the cockpit forward bulkhead and aft bulkhead to the right side fuselage. With bulkheads set in position, cement the floor, the floor also serves as the nose wheel attachment base. If the floor is too high, the nose gear will not be the proper length from the fuselage. Attach the cockpit side walls to individually, to each fuselage side.

I added 8 grams of ballast fishing weights, aft of the rear cockpit bulkhead. The instructions incorrectly identifies the main landing gear wheel well rear bulkhead as part A11, note that it is part A9. Also Note the location of the exhaust pipe whose location in the instructions is ambiguous. Plastic tubing cemented to the main gear wheel wells to aid in installation of the gear struts. Nose gear and wheel drilled through and brass rod inserted for strength.

The slots provided for wing and horizontal stabilizer attachment on the left side of the fuselage are angled slightly downwards, relative to the right side slots.


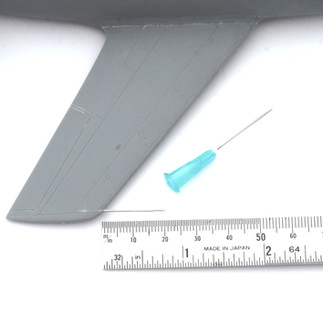
The right wing tip pitot tube is located just inboard of the wing tip fairing and extends forward of the wing leading edge by 20mm.
For symmetrical wing and stabilizer positioning, widen the slots at an angle, to enable upward wing and stabilizer positioning. Nose gear strut and resin nose wheel were drilled through to accept a brass wire for strength. The kit provided clear plastic taxi light was replaced with plastic rod, reflective lense and clear epoxy dome.

Kit provided photo etched seat belt and ejection handles were used to detail Aeroclub EJ024, ejection seats. The seats were painted overall green Humbrol 76, with 113 red-brown head rests, 1 gray seat belts, 11 silver buckles and 174/154 and 33 ejection handles, with yellow and white "placards" on the sides. Once painted, the seats were given a wash of Tamiya X19 smoke, which lets the details stand out.

To correctly position the windshield, the slope molded to the two fuselage halves, must be trimmed at a slight angle. Tamiya orange top welding cement softened the fuselage to enable proper sitting of the clear part, while Tamiya green top cement bonded the clear part to the fuselage. After a 24 hour wait, super glue was applied to smoothen the windshield-ramp joint. Sanding and polishing was needed to restore windshield clarity. To close the canopy, the aft end must be thinned down from the inside using a sharp X-Acto no.11 blade. Once attached to the fuselage, clear two part epoxy is needed to fill the gaps between the canopy and windshield and the aft end of the canopy.

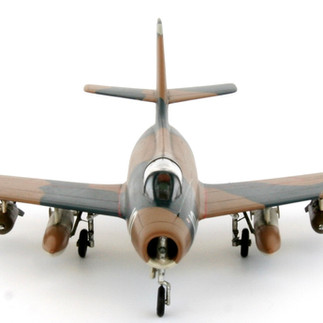
With the canopy and wind shield in place, the nose section seemed a bit odd, to correct the nose section's appearance, the intake lip was reduced in thickness, using the same technique one uses to sharpen a pool que, but this time using sand paper, starting with 600 grit followed by finer grit sand paper. The intake's center divider was detailed and drilled to better represent that of the aircraft.
Mystere IV painting and markings:

Mystere 33 intake, exhaust fairing and suez campaign band locations were sprayed Tamiya gloss white, after the entire model was painted Tamiya gloss black. The suez campaign yellow bands were masked, and the entire model was sprayed Alclad Polished Aluminium. After a coat of Future Klear, decals were applied, with strips of yellow taken from a second IAF kit sheet, to correct contour to decal mismatch at the root of the vertical fin. Isradecal First Fighter Squadron markings replaced the kit’s incorrect graphics. The entire model was weathered with oils and a final layer of Future Klear, slightly flattened with Tamiya Flat Base.


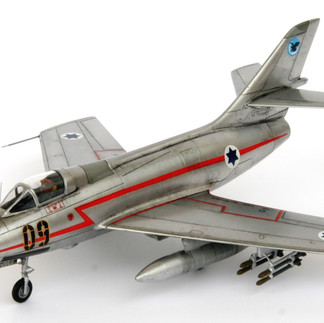
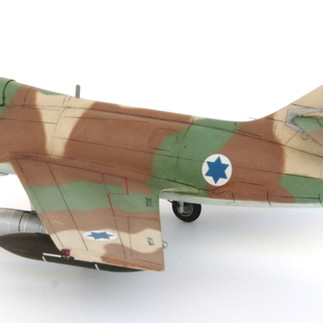
Mystere 09 Natural metal finish was done with an application of Alclad Polished Aluminum applied over AlcladGloss Black primer, followed with Alclad White Aluminum applied to the wings center section, empennage, exhaust and nose intake sections. To replicate the red Valley squadron zig-zag markings I used the “Z” section found in the French boxing of the Mystere, combined with a trimmed to fit long red stripe found in the Israeli boxing of the Mystere IV. The 09 number came from IsraDecal’s Mystere sheet.


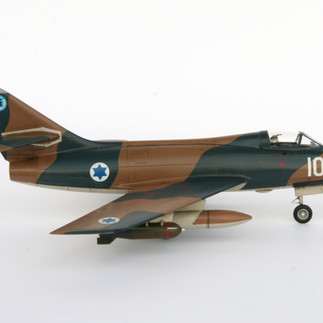
Mystere 10 Six Day War colors were upper surface Mediterranean Sea Blue RAL5008 (Xtracolor X264) and the brown RAL8008 mixed using 3 parts Humbrol 110 to 1 part Humbrol 119 the wing and fuselage lower surfaces matches Humbrol 28 (f.s.36622) light gray. The blue used for the Star of David matched RAL 5001, which was matched perfectly in the kit’s decals. Separation of colours on the real aircraft was attained using hard edge masking which was replicated on the model using 1mm thick strips of Tamiya tape. With the exception of the thin red walkway stripes, all markings were taken from the kit.


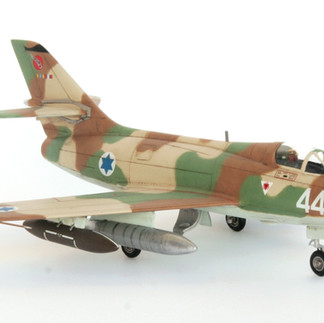
Mystere 44 camouflage was applied by freehand airbrushing using Testors Model Master f.s.35622 duck egg blue, Xtracolor X105 sand, Xtracolor X148 green and Testors Model Master f.s.30219 brown. All markings are from the kit with the exception of the squadron insignia taken from IsraDecal’s Mystere sheet and the thin red walkway decals.


Weathering
was accomplished using a random mix of white, brown and black oil paints thinned with turpentine. Panel lines in the dark blue areas were highlighted with a light gray-brown oil wash. By wiping the oil wash from the panel line down, the curves of the fuselage became pronounced. Atop the wings, the light gray-brown wash was wiped aft to simulate oil and grime flow with the air stream.
Conclusion:
The need to reshape the nose section, and scratch build the external stores put this kit in the intermediate model builder category. This is another kit from the Czech Republic, that fills another long standing void left by European kit manufacturers. Once a recessed detail Fouga Magister is made, MPM should attend to the jet fighters and trainers that came out of the Aeromacci stable; ie, AMX, MB339, and M346 Master for starters.
Credits: Ra’anan Weiss and Patrice Sublemontier for their assistance with this article.
If you like this article and want to support my efforts in maintaining this web site you may make a donation through my PayPal account yoave@elal.co.il
Thank you,
Yoav Efrati


Comments